
Requests Dashboard
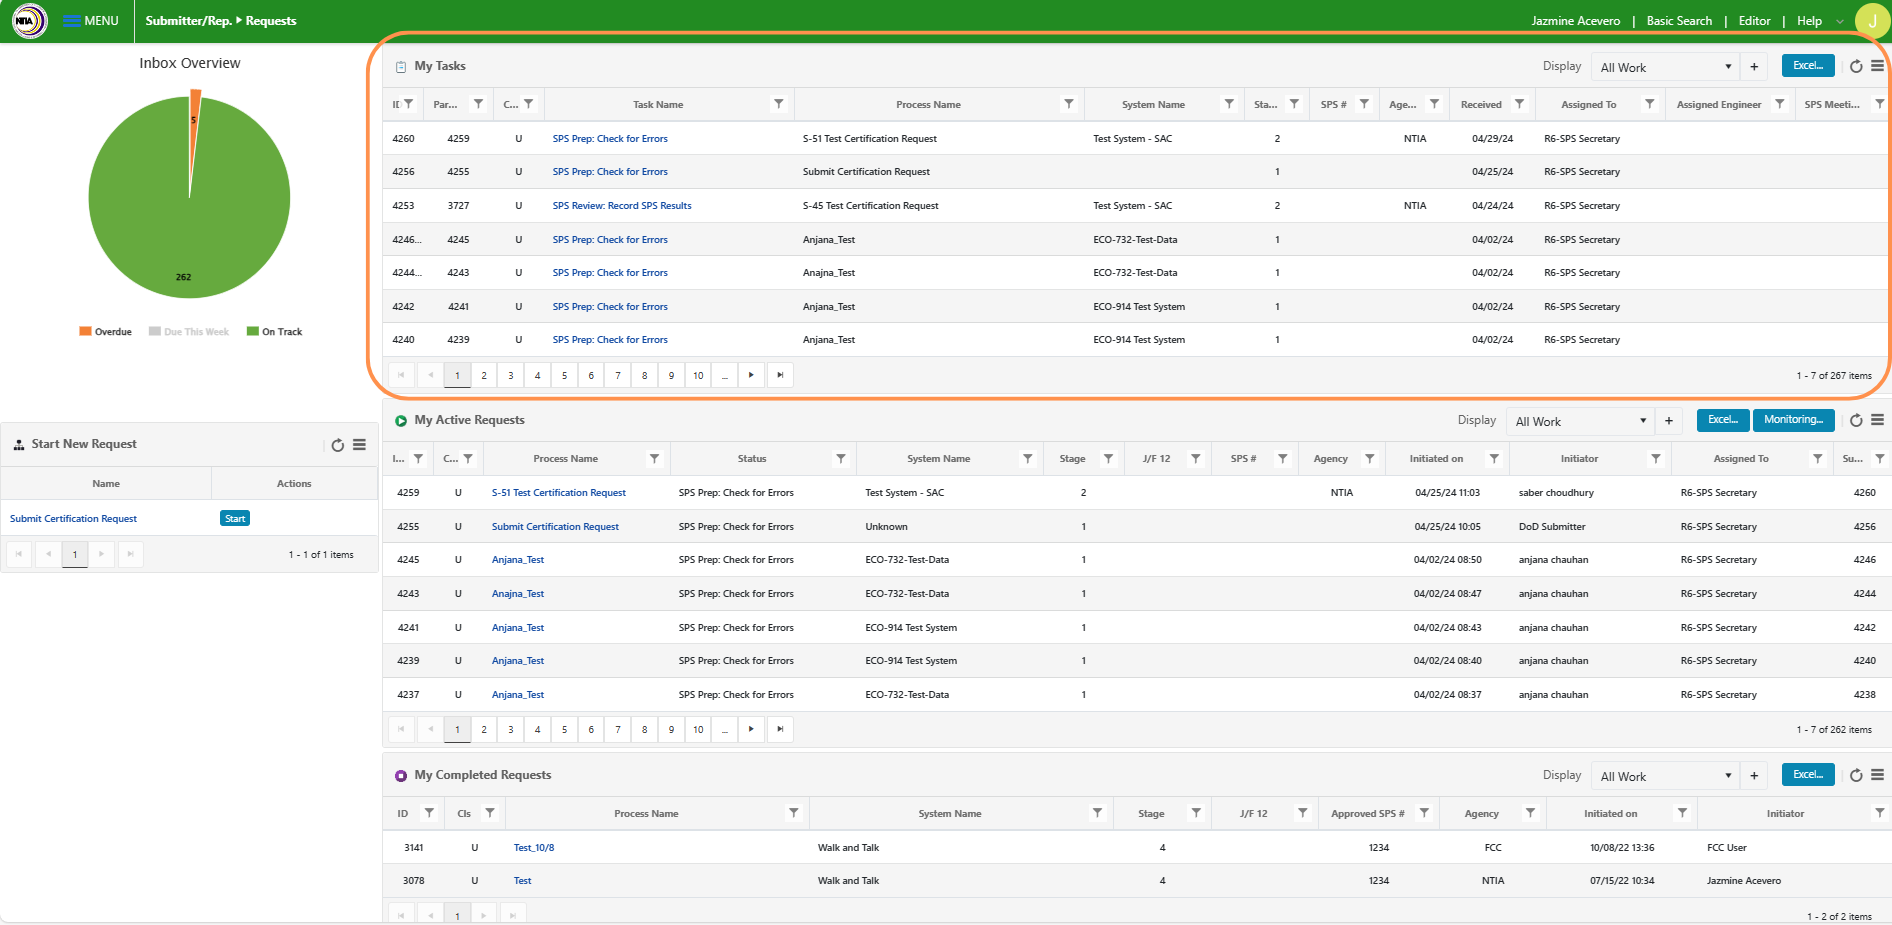
Users access the EL-CID Online workflow through role-based user accounts. When the user logs into the application, the Requests dashboard will appear. This is the main work screen within the workflow. The Requests dashboard features 8 basic widgets identified in the image below and described in the table beneath the image. The rest of this section provides brief overviews of each layout widget.
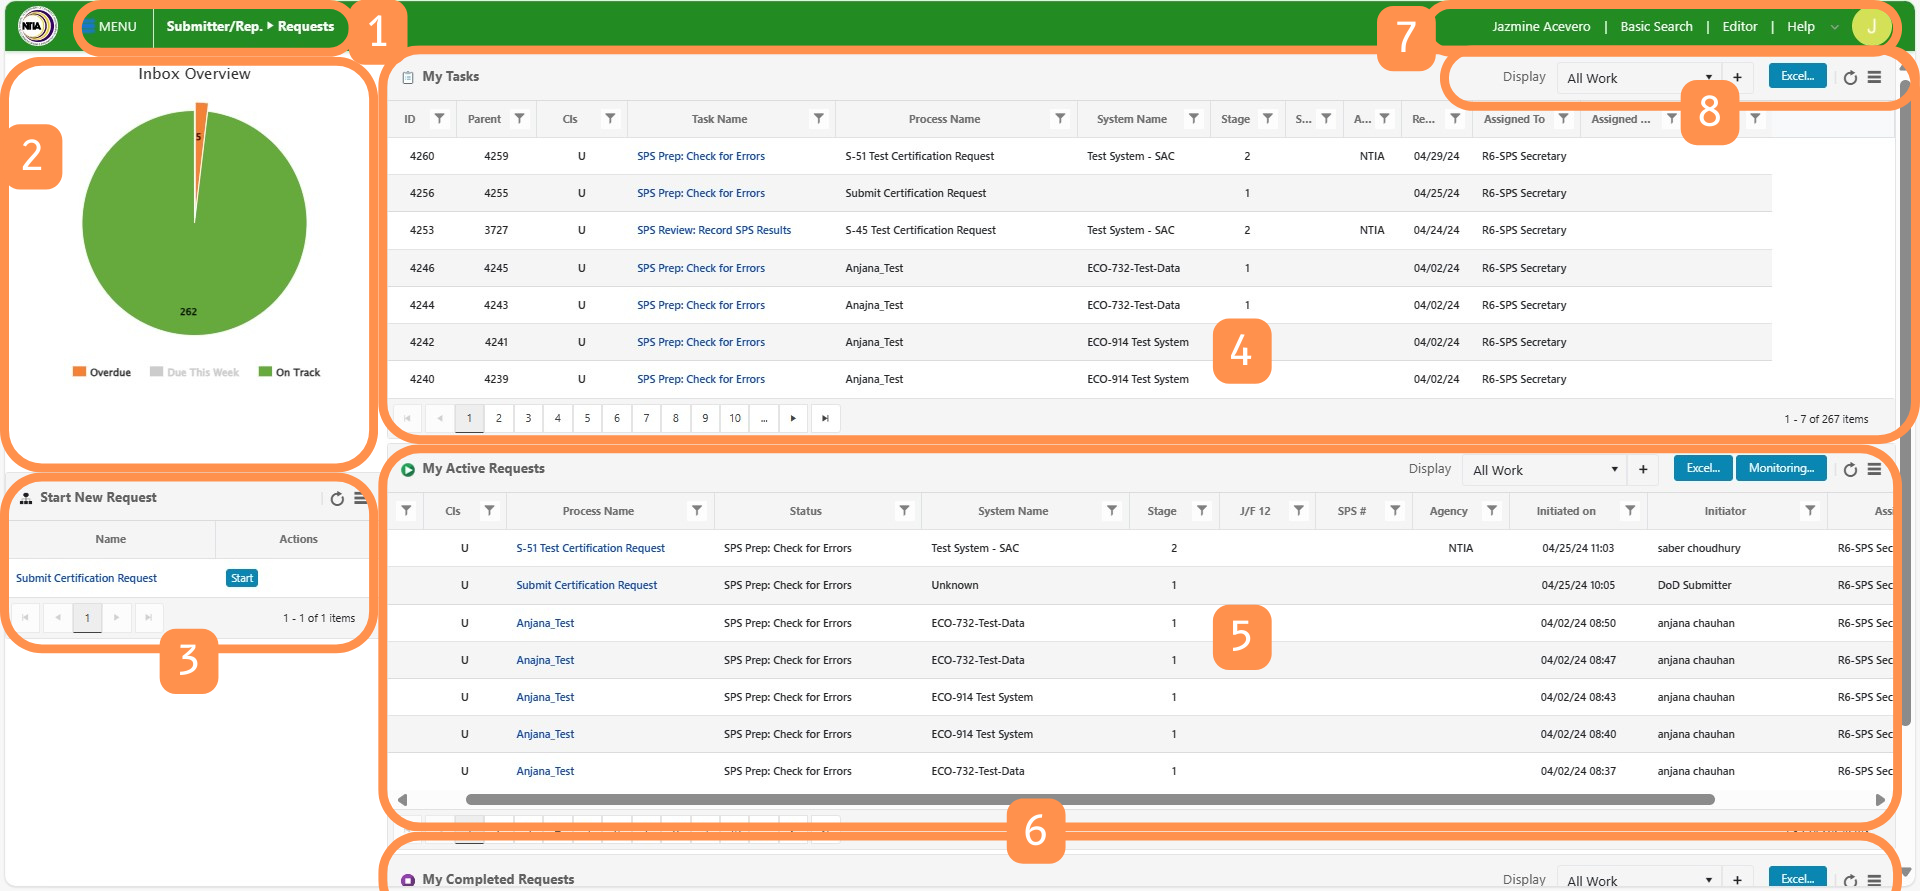
| Dashboard Widget | Descriptions |
|---|---|
| 1 | Dashboard Identification Bar |
| 2 | Inbox Overview Chart |
| 3 | Start New Request for SPS panel |
| 4 | My Tasks table |
| 5 | My Active Requests table |
| 6 | My Completed Requests table |
| 7 | User controls space |
| 8 | Filter, search, and export control bars |
Widget 1: Dashboard Identification Bar
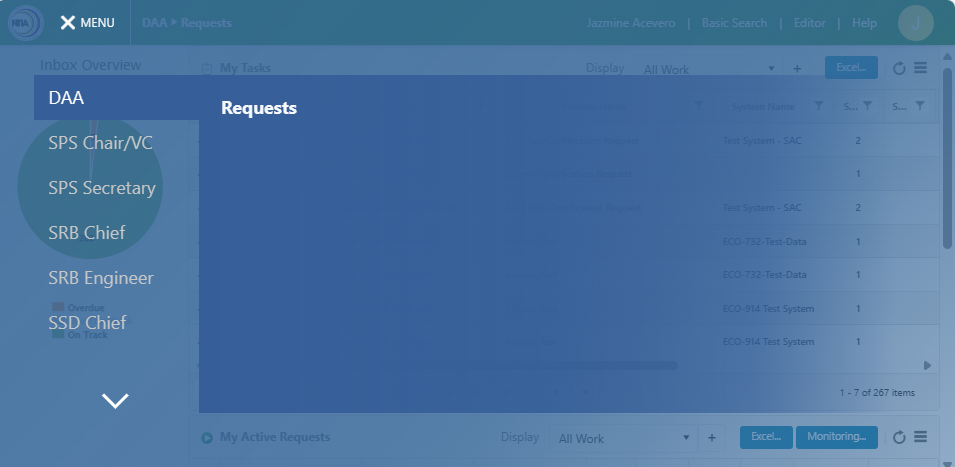
The dashboard identification bar is located in the top-left corner of the interface. It allows users to select which dashboard to view. The dashboard currently being viewed will be highlighted in green. Most users will only use the Requests Dashboard
Widget 2: Graphical Display
The graphical display is a visual tracking and reporting widget located in the middle-left section of the interface.
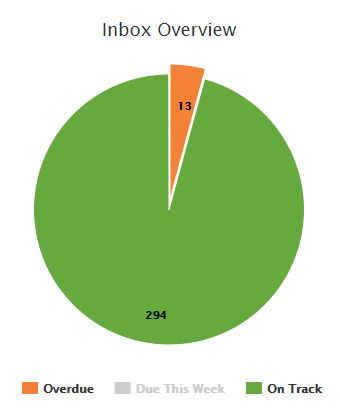
The inbox tracking overview chart displays and tracks the speed with which the user completes tasks in their “inbox”— i.e., items in the “My Tasks” table (see widget 4). The boxes below the circle graph indicate whether the user is “On Track” by completing their tasks in a timely manner, “Overdue” by failing to read messages in a timely manner, or “Due This Week,” by approaching the threshold of application determined deadlines for reading messages.
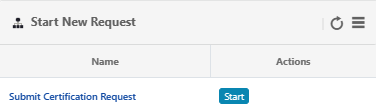
Widget 3: Start New Request in SPS Panel
The Start New Request in SPS panel, located in the bottom-left of the interface, is where the Agency Submitters/Representatives will initiate new requests.
Widget 4: My Tasks Table
Non-sorted look-up tables that store large amounts of data require users to exert considerable effort to find the information they need. To alleviate this need, EL-CID Online automatically sorts certification request processing information into three searchable and sortable tables: tasks, active requests, and completed requests (widgets 4, 5, and 6).
Widget 4, in the top-middle of the screen, consists of the My Tasks table, which stores requests requiring actions on the part of the user. The My Tasks table, also referred to as the “inbox,” is the primary work area in which users will conduct tasks within the workflow element of EL-CID Online.
The My Tasks table contains 10 information columns:
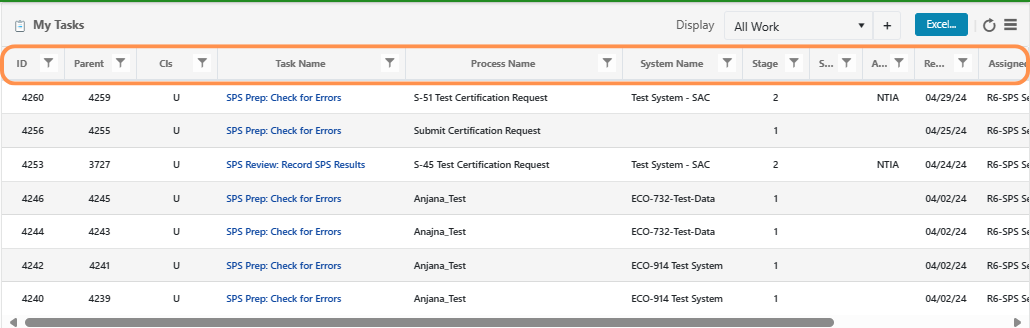
Most of the columns contain self-explanatory labels with which EL-CID desktop users will be familiar. The table below explains the information type contained in each column.
| Column | Contains |
|---|---|
| ID | Classification of the request. U = unclassified, C = classified. |
| Task in Request | Description of task needed and associated request title |
| Stage | Operational status stage of the request: 1 = conceptual, 2 = experimental, 3 = developmental, 4 = operational |
| J/F 12 | Identification number used for DoD systems |
| SPS# | Number assigned to a request by the NTIA Spectrum Planning Subcommittee (SPS) |
| Agency | Agency that submitted the request |
| Received On | Date task was received through EL-CID Online |
| Assigned To | User or group to whom the current task has been assigned |
| Assigned Engineer | Review engineer to whom the request has been assigned |
Widget 5: My Active Requests Table
For all roles except the SRB Chief, the My Active Requests table contains all open requests initiated by the user or that the user participated in at some point. Instead of a My Active Requests table, the SRB Chief views an All Active Requests table which contains all open requests in the workflow.
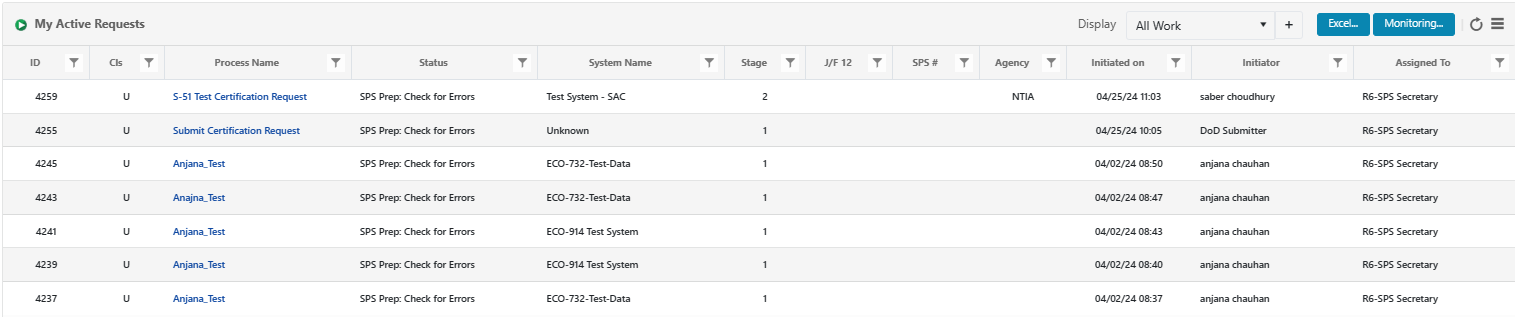
To maintain task flow integrity, both active requests and completed requests are view-only and cannot be edited. To view basic information about an active or completed request, the user should click on that specific request.)
Widget 6: My Completed Requests table
The My Completed Requests table is located in the bottom-middle of the interface. It stores requests that are completed, initiated, or processed by the user. Because these requests require no further actions on the part of the user, the My Completed Requests table is view-only, and will primarily be used for record keeping and performance assessment purposes.

Widget 7: User Controls Space
The user profile space is located in the top-right of the interface. This space identifies the user, contains preference options, houses the help menu, and allows the user to log out of the workflow.

Widget 8: Filter, Search, and Export Bars
Each of the 3 request tables (widgets 4, 5 and 6) contains a filter, search, and export bar, located in the table's top-right corner. These bars allow users to filter and search each table, and export table contents into an Excel sheet. These bars also provide refresh, preferences, and table maximize features accessible through the button and icons located on the right side of the bar.

Instead of a My Completed Requests table, the SRB Chief views an All Completed Requests table which contains all completed EL-CID Online requests.
The user may maximize the My Tasks, Active Requests, and Completed Requests tables to fill the entire screen. For details, see Maximize.
The help menu can only be accessed from the main Requests screen by using the ![]() button. When new users log onto EL-CID Online they should select the Help button, which will open up online help as a separate browser tab, and keep the help tab open as long as they remain in the application.
button. When new users log onto EL-CID Online they should select the Help button, which will open up online help as a separate browser tab, and keep the help tab open as long as they remain in the application.